
Quick answer: If your basement flooded and you have an NFIP or Write Your Own flood policy, do three things first: make the space safe (power off, no contact with contaminated water), photograph and video everything before anything is moved or dried, and file your notice of claim immediately. You have 60 days from the date of loss to submit a signed, sworn Proof of Loss — and if the claim is denied, only one year from the first written denial to file suit.
Written by licensed public adjusters who represent policyholders — not insurers — in NFIP and WYO flood claim disputes.
Water is in the basement. The smell is wrong. The drywall looks swollen. Someone from the flood insurer is supposed to call, and you're already worried they'll tell you this is “limited,” “repairable,” or somehow your fault.
That fear is justified.
A basement flood claim under the National Flood Insurance Program or a Write Your Own insurer turns into a fight fast. The restoration process is where that fight is won or lost. If you let the carrier define the damage, they'll reduce the scope. If you control the evidence, the scope gets harder to slash. That's the difference between a shallow cleanup check and a real payment that funds proper basement flood restoration.
Table of Contents
- What Should You Do First After A Basement Flood?
- Understanding The NFIP Adjuster's Playbook
- What Does Complete Basement Flood Restoration Actually Require?
- How Do You Build A Proof Of Loss The Insurer Can't Pick Apart?
- How Do You Fight A Low-Ball Flood Estimate And Calculate The True Cost?
- Why Should You Hire A Public Adjuster For A Flood Claim?
- What Do NC And VA Homeowners Need To Know About Flood Claims?
What Should You Do First After A Basement Flood?
Panic is normal. Bad decisions made in panic are expensive.
Your first moves have two purposes: protect the people in the house and protect the claim. Those are not separate tasks. The same discipline that keeps you out of a dangerous basement also stops the insurer from rewriting what happened later.
Treat safety and evidence as the same job
If the source of the water isn't obvious, stop acting like this is a simple cleanup. Mainstream advice often skips the hardest question: when is it too dangerous to enter at all? Guidance on flooded basements regularly misses the actual decision threshold for contaminated water, structural risk, and when DIY needs to stop, especially for electrical hazards, sewage, and storm-surge flooding, as noted by Servpro's flooded basement guidance.

Use this triage logic:
- If outlets, appliances, or extension cords are in contact with water, stay out until power is shut off safely.
- If sewage, drain backup, or storm water is involved, don't start handling contents with bare hands and don't let anyone talk you into “just drying it out.”
- If walls are bowed, stairs feel loose, or the floor feels unstable, don't enter for a salvage mission.
Practical rule: If you can't identify the water source and confirm the electrical safety of the space, your next call is for help, not a shop vac.
Once the area is safe to approach, start the evidence file immediately. Before you move a box, before you pull up carpet, before a contractor starts extraction, take photos and video from the doorway, the stairs, and each corner you can safely reach.
If you're also thinking ahead about stopping mold before it starts, do it only after you've preserved the initial condition of the space. Insurers love “before and after” gaps. Don't give them one.
What to document before anything moves
Most homeowners under-document the exact items that become disputed later. Get specific.
Water line and spread
Film the floor, baseboards, lower drywall, doors, furniture legs, stored contents, and any visible staining.Source clues
Record sump pump area, foundation walls, floor drains, utility penetrations, window wells, and exterior grading if it may help explain how floodwater entered.Materials that trap water
Photograph carpet, pad, drywall, insulation, laminate flooring, wood trim, cardboard boxes, upholstered furniture, and stored textiles.Mechanical and electrical impact
Capture water heaters, furnaces, duct boots, outlets, appliances, and panels if they're safely visible.Debris and contamination indicators
Mud lines, odor sources, silt, sewage residue, discolored water, and floating debris all matter.
Create one folder for photos, one for video, one for receipts, and one for conversations. Write down who said what, and when. The insurer's timeline will become very selective later. Yours shouldn't be.
Understanding The NFIP Adjuster's Playbook
The adjuster who shows up after a flood is not your advocate. That doesn't mean they're always rude or incompetent. It means their role is limited, and that limitation matters when your basement needs a full restoration instead of a cosmetic cleanup.
What their job is and what it is not
NFIP and WYO flood adjusters work inside a tightly controlled system. They inspect, measure, and report, but they do not wake up trying to maximize your recovery. They work within policy language, carrier procedures, and scope decisions that often lean narrow. If you assume they'll build the fullest version of your loss for you, you're already behind.
For a broader breakdown of how flood claim disputes take shape, read this guide on insurance claim flood disputes.

The insurer benefits when the claim stays small, simple, and visible. You need to think the opposite way. Flood damage in a basement is usually layered. Water extraction is one layer. Structural drying is another. Sanitation, removal of unsalvageable porous materials, hidden moisture investigation, and rebuilding are separate issues.
The first person to define the scope usually controls the money. If that first scope is thin, every later discussion becomes a fight to add back what should've been there from day one.
How scope gets cut down
Insurers and their adjusters don't need dramatic misconduct to underpay a basement flood restoration claim. They can do it through ordinary-looking omissions.
Here's how that happens:
| Carrier move | What it looks like in real life | Why it hurts you |
|---|---|---|
| Narrow cause framing | They focus on one visible entry point and ignore broader spread | Parts of the basement get left out |
| Surface-only inspection | They price what they can see without aggressive moisture investigation | Wall cavities and insulation damage vanish from the estimate |
| Repair bias | They lean toward cleaning and drying instead of removal | Contaminated or unsalvageable materials stay in dispute |
| Minimal equipment assumptions | They assume a light drying setup and short duration | The estimate misses real mitigation needs |
| Pricing pressure | They use lower-end repair assumptions | Your contractor says the budget won't complete the work |
The strict interpretation problem is real. NFIP-style claims don't reward assumptions, emotion, or casual conversation. They reward documentation. If hidden damage is not measured, photographed, mapped, and tied to the flood event, they'll often treat it like it doesn't exist.
That's the playbook. Reduce the visible area, minimize the removal, shorten the drying, and force you to prove the rest.
What Does Complete Basement Flood Restoration Actually Require?
You walk into the basement after the water drops. The floor looks better. The walls look mostly intact. The adjuster acts like the worst is over.
That is the trap.
Basement flood restoration is a sequence of work, and every step in that sequence creates claim value. If the carrier only pays for the parts that were obvious on inspection day, you get stuck financing the rest. You need to read the restoration process the way a public adjuster reads it. As a roadmap for what the insurer omitted, what the contractor will later uncover, and what belongs in your proof of loss documentation for a flood claim.
Real restoration follows a chain of work
A proper basement flood job starts with making the area safe, removing water, opening up wet materials where needed, drying the structure with commercial equipment, monitoring moisture, cleaning affected surfaces, and then rebuilding only after the structure is dry enough to close. Every one of those steps can produce costs the first estimate tries to dodge.
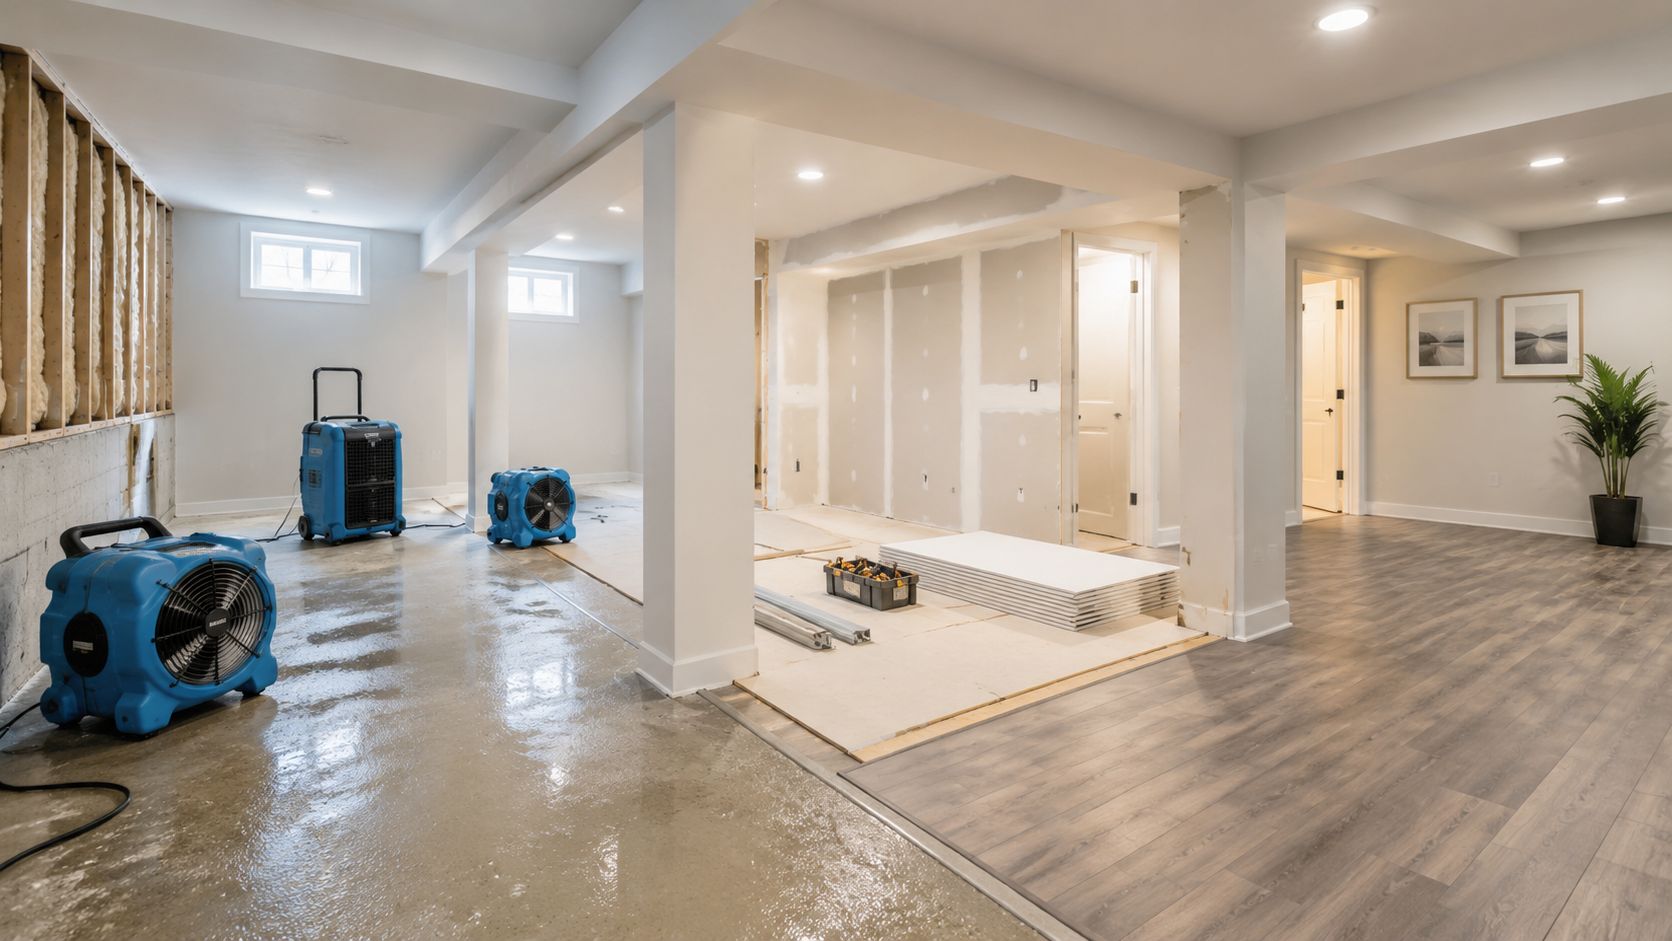
Insurers love to treat that process like a simple extraction job with a few fans. That framing saves them money. It also ignores how flood water affects cavities, insulation, trim, flooring layers, and lower wall assemblies.
The fight usually starts here. They approve water removal and limited drying. Your restoration contractor starts opening materials and finds trapped moisture, contamination, swelling, odor, and damage that could never have been solved with surface drying alone.
Hidden moisture is where the estimate falls apart
Flood claims get underpaid in the spaces you cannot see.
A basement can look dry while framing still holds moisture behind the wall. Insulation can stay wet long after the painted surface feels normal. Trim, built-ins, and floor layers can trap water and slow drying. Once the contractor tests, removes, or exposes those areas, the original estimate often collapses.
That is why visual inspection is such a gift to the carrier. It lets them write a cheap scope with clean lines and low quantities, then force you to prove every added step later.
Professionals often remove affected lower drywall and insulation well above the visible water line because water wicks, spreads, and lingers inside the assembly, as shown in this basement restoration walkthrough video. If your estimate only pays for what was wet to the eye, it is probably missing what had to be opened to dry the structure correctly.
This visual explains what proper drying work looks like in the field.
Match each restoration step to a claim line item
Do not argue in generalities. Force the carrier to account for the full workflow.
Use the restoration sequence as your checklist:
- Water extraction should be followed by line items for equipment, setup, monitoring, and labor tied to structural drying.
- Drying equipment raises the question of access. If walls, insulation, or floor layers trapped moisture, where is the demolition needed to expose those areas?
- Demolition raises the rebuild issue. If they pay to remove drywall, baseboards, insulation, or flooring, where is the money to put it back?
- Cleaning and antimicrobial treatment raise contamination questions. If flood water affected surfaces or cavities, where are the cleaning, disposal, and protective measures?
- Moisture monitoring raises duration. If they assumed a short dry-out, what readings support that assumption?
That is how you attack a basement flood estimate. Line by line. Step by step. You make them explain why the actual restoration process stopped the moment the claim got expensive.
When the insurer writes for what looked wet during a quick visit, and the restoration contractor writes for what had to be done to dry, clean, remove, and rebuild, the contractor's scope usually reflects the actual loss.
The carrier's playbook is simple. Keep the claim at the extraction stage, resist demolition, ignore hidden moisture, and delay full payment until the homeowner is exhausted. Do not cooperate with that script. Use the restoration workflow to show the full chain of necessary work and make every omission visible.
How Do You Build A Proof Of Loss The Insurer Can't Pick Apart?
Three weeks after the flood, the basement looks stripped, the dumpster is gone, the smell has faded, and the adjuster suddenly acts confused about why your claim grew. That is not confusion. It is the script. The carrier counts on the restoration work erasing the visual shock while your file stays thin.
Your proof of loss has to stop that cold.
A basement flood claim rises or falls on documentation that ties the restoration work to the money owed. If your file only shows wet floors and a few damaged boxes, the insurer will write for a small cleanup. If your file shows what had to be removed, dried, cleaned, discarded, monitored, and rebuilt, you force a real claim evaluation.
Photos help. They do not carry the fight by themselves.
The file needs four things working together: condition, cause, scope, and price. That means before photos, during photos, moisture records, contractor scopes, invoices, disposal evidence, and a clear separation between building damage and contents damage. As noted earlier, porous materials that stay wet often have to be removed, not just sprayed and ignored. Your proof of loss should reflect the actual restoration sequence, not the insurer's watered-down version of it.
What belongs in the file
Build the package like you are preparing for an argument with someone looking for omissions, because you are.
Room-by-room damage log
List each affected area and identify what happened to walls, insulation, flooring, trim, doors, utilities, and built-ins. Be specific about staining, swelling, warping, contamination, and removal.Contents inventory
Separate personal property from the building claim. Itemize shelving, furniture, tools, seasonal storage, electronics, appliances, and household goods with age, condition, and replacement cost support where possible.Independent contractor scopes and estimates
Get estimates from contractors who answer to you. Preferred vendors often write narrow scopes that fit the carrier's budget, not the damage.Drying records and moisture support
Collect meter readings, moisture maps, equipment logs, and daily monitoring notes. If hidden moisture drove demolition or extended drying time, prove it.Contamination evidence
Document residue, odor, debris, unsanitary water contact, recommended cleaning methods, protective measures, and disposal decisions. If the carrier wants to pretend the water was harmless, make that position look reckless.Disposal trail
Save dumpster receipts, haul-off invoices, curbside photos, bagged debris photos, and contractor notes identifying what was removed and why.
For a tighter explanation of how the document itself should be organized, review this guide to a property insurance proof of loss.
A proof of loss should read like a reconstruction backed by evidence, not a request for sympathy.
That means dates matter. Sequence matters. If water came in on Friday, extraction started Saturday, drywall cuts happened Monday, and dehumidifiers ran through Thursday, pin that down. A carrier can attack vague memory. It has a much harder time attacking a dated chain of events supported by invoices, photos, and readings.
Keep the claim split into two clean categories:
| Proof category | What belongs in it |
|---|---|
| Building claim | Drywall, insulation, flooring, trim, doors, built-ins, utilities, cleanup, drying, demolition, rebuild |
| Contents claim | Furniture, boxes, clothing, décor, tools, appliances, stored personal items |
This separation matters because insurers use blur and confusion to shave dollars off both sides. If a workbench gets buried inside the building estimate, or built-in shelving gets tossed into contents, something gets reduced or dropped.
One more tactical point. If you had to throw damaged material out fast, do not apologize for it. Document it. Unsafe drywall, soaked insulation, contaminated contents, and foul debris often cannot sit around waiting for a second photo session. The insurer may act offended that the evidence is gone. Ignore the theater. What matters is the paper trail showing what was removed, when, by whom, and for what reason.
How Do You Fight A Low-Ball Flood Estimate And Calculate The True Cost?
The first offer is often a pressure tactic disguised as resolution. It's meant to look official enough that you hesitate to challenge it.
What the numbers really tell you
Basement flood cleanup is not cheap. It commonly averages about $4,000 in the U.S., with typical projects ranging from $2,000 to $7,000, and severe contamination can reach $15,000 or more. Many contractors also price work around $3 to $7 per square foot, with costs rising sharply by water category. Clean water cleanup is often $1,500 to $3,500, gray water $3,000 to $7,000, and black water $7,000 to $15,000. Mold remediation can add $500 to $6,000, a new sump pump can cost $600 to $2,500, and replacing damaged flooring, drywall, or insulation can add another $1,000 to $5,000, according to Angi's flooded basement cleanup cost breakdown.

Those figures matter because a basement flood claim is rarely one invoice. It's extraction, drying, sanitation, demolition, disposal, and rebuild. If contamination or mold enters the picture, the economics change fast.
Where low-ball estimates usually cheat you
The insurer's estimate often looks tidy because it strips out the messy parts. That's not efficiency. That's under-scoping.
Compare the two approaches:
| Low-ball approach | Full basement flood restoration approach |
|---|---|
| Limited water extraction | Extraction plus monitored structural drying |
| Cleaning visible surfaces | Cleaning plus sanitation and contamination response |
| Minimal demolition | Removal of unsalvageable porous materials |
| Short equipment duration | Drying based on moisture conditions, not wishful thinking |
| Cosmetic repair pricing | Reconstruction pricing that reflects what was actually removed |
The fight is not about whether $4,000 is a “fair” number in the abstract. The fight is whether your basement falls at the low end of that cost range or into a much larger scope once contamination, tear-out, or rebuild are factored in. The carrier will almost always argue downward.
Rejecting a low-ball offer doesn't require drama. It requires a disciplined rebuttal.
- Identify omitted line items and point to the contractor scope or mitigation records.
- Challenge unsupported salvage assumptions for drywall, insulation, carpet pad, and other porous materials.
- Separate emergency mitigation from reconstruction so the carrier can't pretend one invoice covered both.
- Demand written explanation for every denied or reduced category.
If their estimate wouldn't let a competent contractor finish the job safely, it's not a restoration estimate. It's a negotiating position.
Don't let the paper intimidate you. Adjuster software prints numbers. That doesn't make those numbers complete.
Why Should You Hire A Public Adjuster For A Flood Claim?
Flood claims are technical, document-heavy, and usually adversarial long before the insurer admits it. That's why many homeowners lose money even when the damage is obvious.
You need your own expert, not theirs
A public adjuster works for the policyholder. That distinction changes everything.
The company adjuster inspects for the carrier. The independent adjuster often reports within the carrier system. The public adjuster documents, scopes, values, and negotiates for you. If the dispute is over hidden moisture, demolition scope, restoration pricing, or whether the carrier's estimate is fantasy, you need someone who knows how property claims are built from the inside.
If you want a clearer sense of that role, this overview of a public claims adjuster is a useful starting point.
A good public adjuster doesn't just “argue more.” They change the structure of the file. They organize the scope, push for missing inspections, coordinate supporting estimates, challenge pricing, and keep the carrier from shrinking the loss down to what was visible in one short visit.
When representation changes the leverage
Homeowners usually call for help after one of these moments:
- The estimate is too small to do the work their contractor says is necessary.
- The adjuster ignored hidden damage behind walls, under flooring, or inside insulation.
- The insurer delays decisions while the property sits open or partially dried.
- The payment arrives with no real explanation for what was excluded.
That's when influence is paramount. A represented claim is harder to dismiss with vague language and half-scoped paperwork.
You also need emotional distance. Flood losses are exhausting. People are displaced, angry, embarrassed, and tired of arguing. Insurers know that. They count on fatigue. A public adjuster steps into that gap and keeps the dispute from becoming a battle of your memory versus their file notes.
This is not about picking a fight for sport. It's about making sure the basement gets restored properly and the claim reflects that reality.
What Do NC And VA Homeowners Need To Know About Flood Claims?
A nor'easter clips the coast, a tropical system stalls inland, or days of hard rain overwhelm drainage around the foundation. By morning, the basement is wet, the restoration crew is talking demolition, and the carrier is already looking for ways to narrow the claim. That is a familiar fight in North Carolina and Virginia.
These two states get hit from multiple directions. Coastal surge, river flooding, flash flooding, hydrostatic pressure, and saturated soils all show up here. Basements and lower-level spaces take the hit, and the NFIP or WYO insurer often treats the loss like a small cleanup issue instead of the full restoration project it becomes.
That mistake costs homeowners money.
Regional flood patterns create claim problems that adjusters exploit
In NC and VA, flood losses often involve more than visible water lines. Wet insulation, increased slab moisture, damaged wall cavities, contaminated contents, and delayed microbial growth are common after basement flooding. FEMA's flood cleanup guidance warns that drying and cleaning after a flood takes time and that floodwater can contaminate materials throughout the affected area, not just the surfaces you can see on day one. Review FEMA's guidance at Ready.gov's flood cleanup page.
That matters for one reason. Carriers love fast snapshots. Basement restoration does not work on snapshots. It works on moisture readings, demolition notes, drying logs, photos, haul-off records, and contractor observations taken over time.
If your adjuster inspected once, wrote a thin estimate, and acted like the claim was basically done, you are already in the danger zone.
What NC and VA homeowners should do differently
Do not let local urgency turn into insurance sloppiness. Storm seasons here create volume, and volume creates bad claims handling.
Use this checklist:
Get the line-item estimate
Ask for the full scope with quantities, unit prices, and depreciation. You need to see what they omitted, not just what they paid.Match the carrier's scope against the actual restoration file
Compare the estimate to the mitigation invoice, moisture map, drying logs, demo photos, sanitation charges, and rebuild recommendations. Gaps here are where underpayment starts.Document regional water behavior
In NC and VA, repeated rain events, high groundwater, and slow drying conditions matter. Save weather reports, flood notices, and contractor notes that explain why materials stayed wet longer or required broader removal.Pin down what was called basement property
Flood policies draw hard lines around basement areas and lower enclosures. Carriers use those rules aggressively. Make them identify each item they excluded, the exact policy basis, and the factual reason they think it belongs in that category.Force the dispute while evidence still exists
Once walls are closed, flooring is replaced, and damaged material is gone, the insurer's version gets easier to sell. Fight over scope before the rebuild erases the proof.
NC and VA homeowners get hurt when they assume a local adjuster understands local flood behavior and will scope the claim fairly. Do not make that assumption. Some do solid work. Plenty do not. The ones looking to save the carrier money will use basement limitations, narrow measurements, and incomplete moisture investigation to cut your number down fast.
Flood restoration in this region is a race between real conditions and the insurer's paperwork. Win the file, and you have a chance to get paid correctly. Lose the file, and the basement gets rebuilt on your dime.
For The Public Adjusters, Inc. helps homeowners and business owners in North Carolina and Virginia fight denied, delayed, and underpaid property claims, including difficult flood disputes involving NFIP and WYO insurers. If your basement flood restoration claim has been low-balled, narrowed, or buried in adjuster paperwork, get help before the evidence disappears and the carrier locks in a bad number. Have your water damage claim questions answered at NO COST. Call 919-400-6440 to speak with a licensed Public Insurance Adjuster or Contact Us here with questions. WE Work For YOU… NOT Your Insurance Company!
What Does The Standard Flood Policy Actually Cover In A Basement?
Before you plan a fight for full basement restoration, understand the policy’s hardest limit. The Standard Flood Insurance Policy defines a basement as any area with its floor below grade on all sides — and it sharply restricts coverage there. That limit shapes every scope discussion, and adjusters use it aggressively.
What the SFIP generally does cover in a basement: structural elements like the foundation, unfinished drywall and insulation, staircases, sump pumps, well water tanks and pumps, water heaters, furnaces, central air conditioners, heat pumps, electrical junction and circuit breaker boxes, fuel tanks, and — for personal property — washers, dryers, food freezers and the food in them. Cleanup of the basement itself is also covered.
What it generally does not cover in a basement: finished walls and ceilings, paneling, carpet and most floor coverings, bookcases, and nearly all personal property stored below grade — furniture, electronics, clothing, boxes of belongings. If your finished bas