Why the First 72 Hours After a Water Loss Decide Your Claim (Water Damage Documentation Basics)
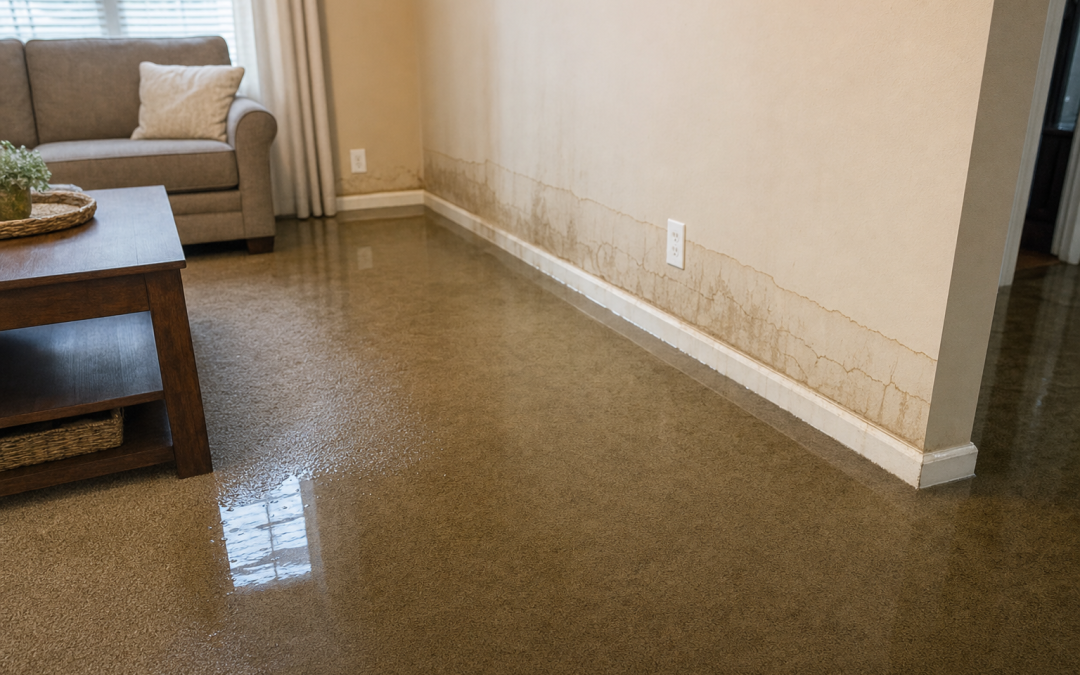
Water damage documentation matters most in the first 72 hours because that’s when the evidence your claim depends on — soaked drywall, saturated flooring, ruined belongings — gets torn out and hauled to a dumpster. Once mitigation begins, you can’t photograph what’s gone. Documenting everything before demolition protects your right to a full payout.
Key takeaways
- Photograph and video everything before the mitigation crew removes materials — once drywall, flooring, or contents are gone, so is your best evidence.
- Ask the mitigation contractor for daily moisture readings and drying logs; these records often decide disputes over how far the damage actually spread.
- Read assignment of benefits (AOB) and direction-to-pay clauses carefully before signing — they can hand control of your insurance claim proceeds to the contractor.
- Keep every damaged item (or clear photos and an inventory of it) until your insurer has documented the loss; discarding contents too early can hurt your claim.
- Report the loss to your insurer promptly and in writing, and log every conversation with adjusters and contractors during the first 72 hours.
Here’s the uncomfortable truth about water losses: the mitigation crew’s job is to dry your home fast, not to build your insurance claim. They will cut out wet drywall, pull up flooring, and discard damaged contents quickly — often within a day or two of arriving. That speed is good for preventing mold, but terrible for proof. If the insurance adjuster shows up a week later and sees only bare studs and fans, the burden falls on you to demonstrate how bad things actually were.
What Disappears Fast After a Water Loss
- Water lines and staining that show how high the water reached on walls and cabinets
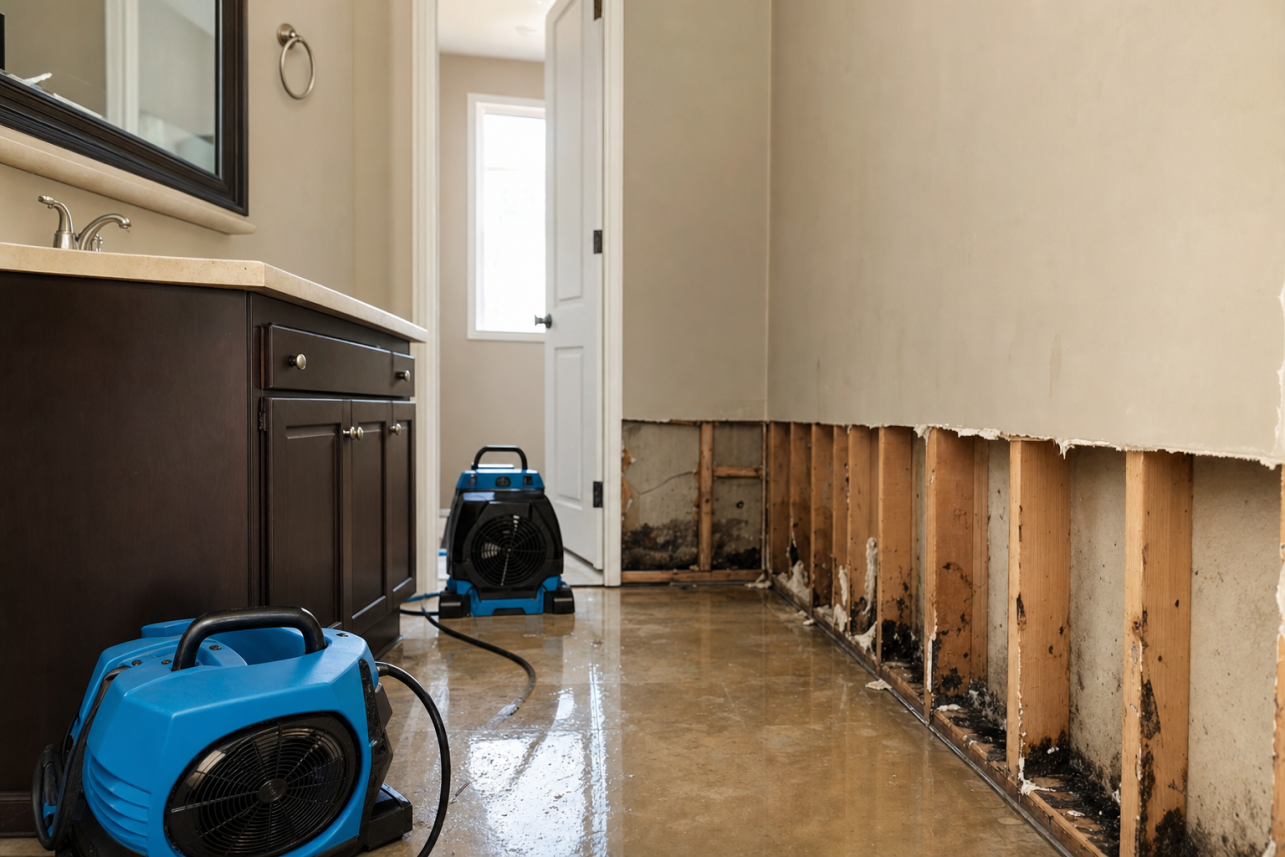
- Saturated materials like drywall, insulation, carpet, and pad that get bagged and removed
- Damaged contents — furniture, electronics, clothing — often discarded before anyone inventories them
- The source of the loss itself, such as a burst pipe section that a plumber replaces and throws away
- Moisture conditions that dry out and can no longer be measured or verified
What You’ll Do in the Next 72 Hours
This guide walks NC and VA homeowners through a simple, repeatable process before anything leaves the house:
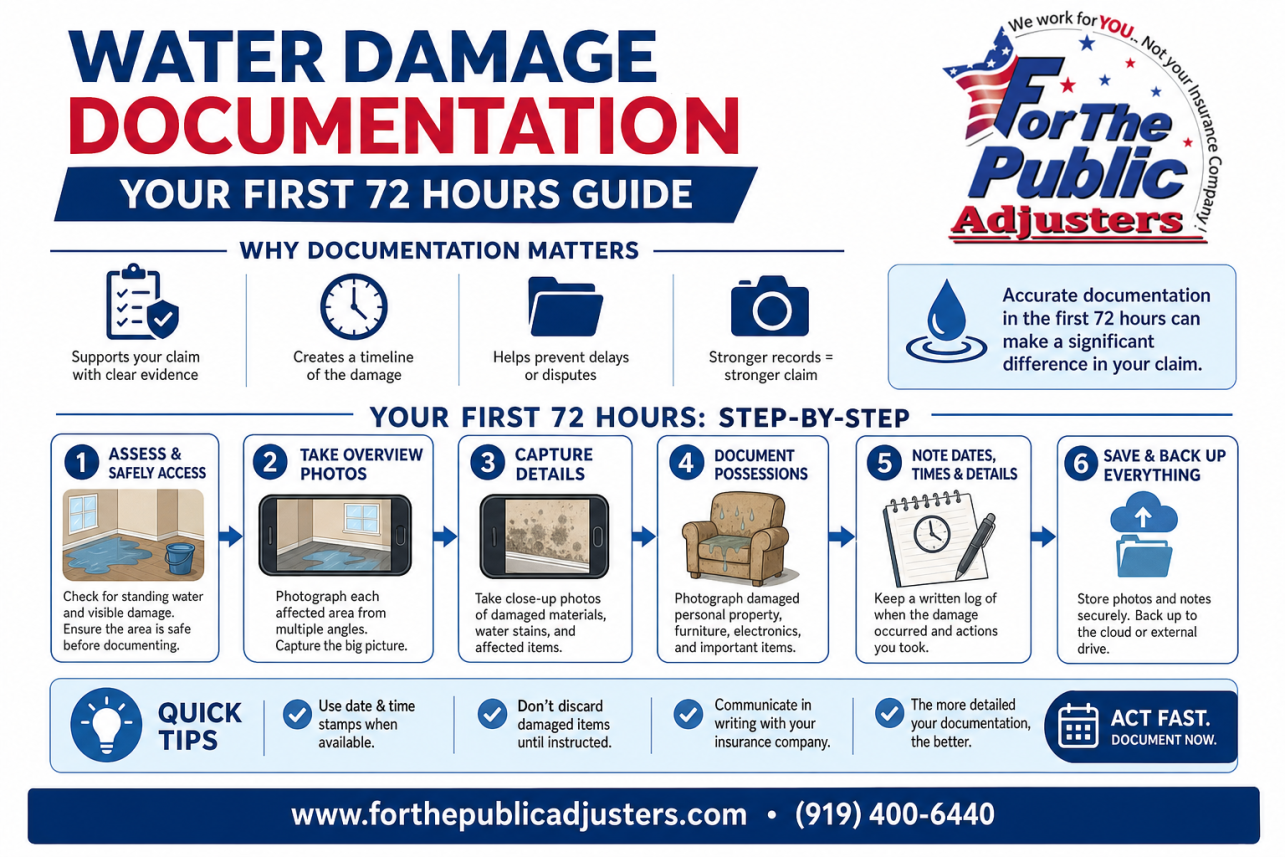
- Photograph and video everything — wide shots, close-ups, water lines, serial numbers, and the source of the leak — before the first piece of drywall comes down
- Request moisture readings and drying logs from the mitigation company, and keep your own copies
- Read the mitigation contract carefully before signing, especially clauses about payment, liens, and who directs the scope of work
- Preserve discarded items where safely possible, or at minimum photograph them before disposal
- Know when to bring in professional help if the insurer’s response doesn’t match the damage you documented
None of this requires special equipment — a smartphone and a notebook are enough. What it requires is doing it before the tear-out, not after. Homeowners who skip this step often find themselves arguing with an adjuster about damage neither of them can see anymore.
If you’re already past the first few days and worried the mitigation crew removed evidence before you documented it, don’t panic — drying logs, invoices, and contractor records can help reconstruct the loss. Resources like this guide to water damage claim help in Burlington NC explain how policyholders can still build a strong claim. But if your loss just happened, the sections below will help you get it right from the start.
What Should I Photograph Before the Mitigation Crew Removes Anything?
Photograph everything exactly as the water left it: the source of the leak, standing water and water lines on walls, every affected floor and wall surface, furniture and contents in place, appliance serial numbers, and wide-angle shots of each room. Once the mitigation crew starts cutting drywall and hauling out flooring, that evidence is gone for good.
Mitigation crews work fast — often within hours of your call — and their job is to remove wet materials, not to build your claim file. That means your water damage documentation has to happen in the narrow window before demolition begins. Use your phone, shoot in good lighting, and take far more photos than feels necessary. You can always delete extras; you can never re-photograph a room after the flooring is in a dumpster.
Start With the Source and the Spread
- The water source itself — the burst pipe, failed supply line, roof opening, or overflowing fixture, before it’s repaired or replaced. Keep the failed part if the plumber removes it.
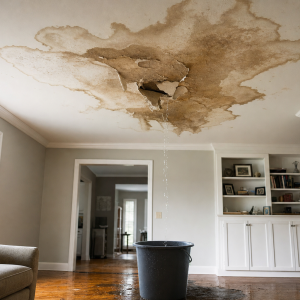
- Standing water and high-water lines — visible staining or wet lines on baseboards, drywall, and furniture legs show how deep the water got.
- The path the water traveled — from the source through hallways, down stairwells, into adjacent rooms, and to the floor below if applicable.
Room-by-Room Checklist
Work through each affected room in the same order so nothing gets skipped:
- Wide establishing shots from each corner and the doorway, so any single close-up can be placed in context later.
- Flooring — buckled hardwood, saturated carpet and pad, lifted vinyl, and cracked tile, including transitions between rooms.
- Walls and ceilings — staining, bubbling paint, sagging drywall, and wet insulation if visible.
- Contents in place — furniture, electronics, rugs, books, and stored items exactly where they sat when the water hit. Moving things first weakens the connection between the loss and the damage.
- Serial numbers and model tags on appliances, electronics, and equipment — these support replacement-cost valuations on your contents claim.
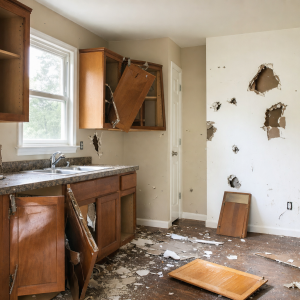
- Inside cabinets, closets, and under sinks — hidden spaces adjusters and estimates often miss.
Don’t Forget Video
A slow walkthrough video of every affected area, narrated with the date and a description of what you’re seeing, ties all your photos together. Video captures things still photos miss — active dripping, running water, and the overall scale of the loss.
If you’re dealing with a burst pipe or storm-driven water loss in North Carolina and aren’t sure your photos will hold up, this guide to water damage claim help in Burlington NC explains how documentation feeds directly into what your insurer will actually pay.
Why Do Moisture Readings and Drying Logs Matter Later in My Claim?
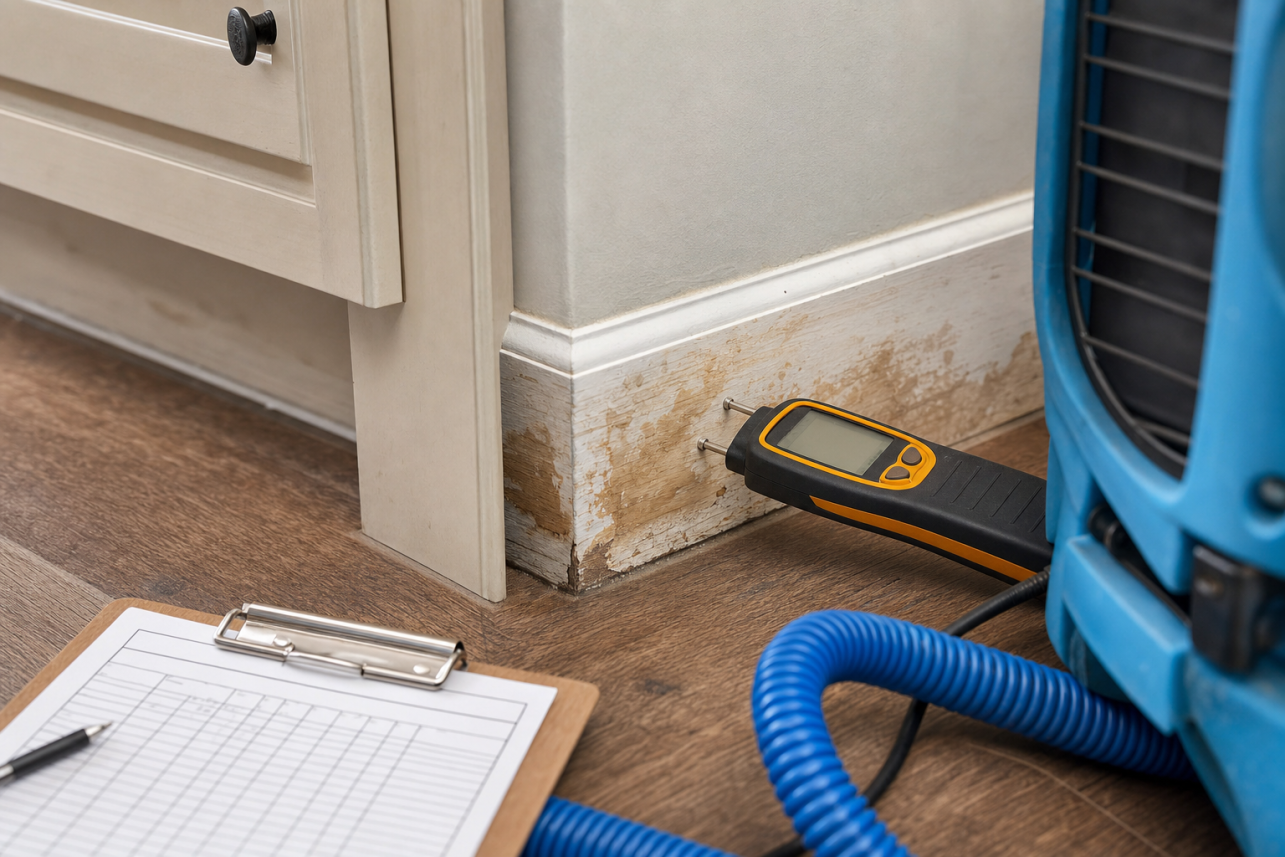
Moisture readings and drying logs are the objective, timestamped evidence of how far water actually traveled through your home. They prove saturation in walls, floors, and cavities that photos can’t show, support hidden-damage and mold-prevention arguments, and give your claim measurable data an insurer cannot easily dismiss.
Photographs capture what water damage looks like on the surface. Moisture data captures what it did beneath the surface. Weeks or months later, when an adjuster questions whether drywall really needed replacement or whether flooring was truly saturated, these records are often the only proof left — because the wet materials themselves are long gone.
The Three Records Your Mitigation Company Should Be Creating
- Moisture maps: Diagrams showing which rooms, walls, and floor areas registered elevated moisture, usually marked with reading locations. These establish the footprint of the loss — including migration into rooms that looked dry.
- Psychrometric readings: Daily measurements of temperature, relative humidity, and grain depression inside the affected space versus outside and unaffected areas. They document that conditions actually supported drying, and they justify how much equipment was needed and for how long.
- Daily drying logs: Day-by-day moisture content readings for specific materials, compared against a dry standard. These show whether materials returned to normal levels or stalled — a stall is often the technical justification for tearing out a material rather than drying it in place.
How This Data Protects You Later
- It proves hidden damage. Elevated readings inside a wall cavity or under flooring support claims for damage that never appeared in a photo.
- It supports mold-prevention decisions. If materials stayed wet beyond a reasonable drying window, the logs justify removal and antimicrobial treatment — and help counter later arguments that mold remediation wasn’t necessary.
- It validates the mitigation bill. Insurers frequently dispute equipment counts and drying duration. Logs showing continued elevated readings are the direct answer to “why did drying take six days instead of three?”
- It anchors the scope of repairs. A moisture map showing saturation two feet up a wall supports a flood-cut and rebuild in every affected room, not just the one where the leak started.
Request Copies in Writing — Early
Don’t assume you’ll automatically receive these records. Send the mitigation company a short email (email creates its own paper trail) requesting complete copies of the moisture map, all psychrometric and moisture-content logs, equipment placement records, and daily notes. Ask before the job closes out, while the file is fresh and staff are responsive. Keep these documents with the rest of your water damage documentation — organized in one place with your photos and correspondence — so nothing is scattered when you or your representative need to build the full picture of the loss.
Which Mitigation Contract Clauses Should I Read Before Signing?
Before signing a mitigation contract, read five things carefully: any assignment of benefits (AOB), direction-to-pay language, how pricing is set, lien rights, and cancellation terms. These clauses control who gets paid, how much, and what happens to your home if a dispute arises — so never sign on a tablet in the hallway without reading them.
Water mitigation crews often arrive within hours, and they typically hand you a contract on a tablet while your floors are still wet. That urgency is real — fast drying matters — but the contract deserves five minutes of your attention. Here is what each clause means in plain English.
Assignment of Benefits (AOB)
An AOB transfers some or all of your insurance claim rights to the contractor. Once signed, the contractor may negotiate directly with your insurer — and in some cases pursue payment — without you in the loop. You lose leverage over your own claim. If a contract includes an AOB, ask why it is necessary and whether the company will work without one.
Direction-to-Pay Language
A direction to pay is milder than an AOB: it instructs your insurer to send payment for mitigation work directly to the contractor. That can be convenient, but confirm the amount is capped at what the insurer approves, so you are not stuck covering a gap you never agreed to.
Price-List and “Insurance Proceeds Plus” Clauses
Many contracts do not state a price at all. Instead, they reference an industry price list (often Xactimate) or say you owe “whatever insurance pays, plus any balance.” Watch for:
- Open-ended pricing: ask for a written estimate or a not-to-exceed figure before major work begins.
- Personal liability language: a clause making you responsible for any amount the insurer declines to pay.
- Equipment charges: daily rates for dehumidifiers and air movers can add up quickly if drying runs long.
Lien Rights
Most mitigation contracts preserve the contractor’s right to file a mechanic’s lien against your home if they are not paid. Both North Carolina and Virginia allow contractors to lien residential property, and a lien can complicate refinancing or selling. Understanding this before signing — and keeping your own water damage documentation of what work was actually performed — protects you if a payment dispute develops later.
Cancellation Terms
Check how many days you have to cancel, whether cancellation requires written notice, and what you owe for work already performed. Some contracts impose steep cancellation fees even if little work has been done.
The Bottom Line for NC and VA Homeowners
You can authorize emergency drying without signing away your claim. If a clause is unclear, ask the crew lead to explain it, photograph every page you sign, and request a copy on the spot. A reputable mitigation company will not object to any of that.
How Does Water Damage Documentation Help If the Insurer Lowballs Me?
Thorough water damage documentation gives you the leverage to challenge a low settlement offer with evidence rather than opinion. Photos, moisture logs, and itemized inventories let you dispute the insurer’s estimate line by line, support appraisal or litigation if needed, and demonstrate that the carrier had full knowledge of the true scope of loss.
Thin Files vs. Thorough Files: The Real-World Difference
When a homeowner with a thin file disputes a low estimate, the argument usually comes down to “my contractor says it costs more.” Insurers hear that every day, and without proof, the adjuster’s estimate often wins by default. A thorough file changes the conversation entirely:
- Scope disputes become factual, not rhetorical. If the carrier’s estimate omits drywall replacement in a hallway, your photos and moisture readings from that hallway make the omission indefensible.
- Pre-loss condition is established. Insurers sometimes attribute damage to wear, tear, or pre-existing conditions. Documentation captured in the first 72 hours undercuts that argument before it starts.
- Bad-faith exposure increases for the carrier. When an insurer continues to undervalue a claim after receiving clear evidence of the loss, its conduct — not just its estimate — comes under scrutiny.
Persistence Backed by Evidence Can Prevail in Court
Policyholders who refuse to accept undervalued estimates, and who can back their position with a well-built claim file, have won meaningful results. In Guessford v. Pennsylvania National Mutual, a case out of the Middle District of North Carolina, a property owner pressed forward against an insurer’s undervalued estimates rather than accepting the initial numbers. That persistence ultimately led to a bad-faith verdict against the carrier. The lesson isn’t that every dispute ends in a courtroom win — most never should reach litigation at all — but that a documented, defensible position gives you standing to push back through every stage: supplemental claims, appraisal, and, if necessary, suit.
How Professionals Use Your Documentation to Move the Number
Public adjusters and policyholder attorneys have used strong documentation to substantially increase underpaid water claims. Their process typically leans directly on the file you built in the first 72 hours:
- Rebuilding the estimate using your photos and drying logs to include every affected room, material, and layer the original estimate missed.
- Proving consequential damage — like microbial growth or warped flooring — was tied to the original loss, not neglect.
- Supporting contents claims with dated images of damaged belongings that would otherwise be impossible to itemize from memory.
No outcome is ever guaranteed, and no professional can conjure evidence that was never captured. But the pattern is consistent: policyholders who documented early and thoroughly negotiate from strength, while those with thin files are often stuck taking the insurer’s word for what their loss was worth.
When Should NC or VA Homeowners Bring In a Public Adjuster?
Bring in a licensed public adjuster when the insurer disputes your scope of damage, denies hidden damage like wet wall cavities, or when your contractor and insurer blame each other. A public adjuster represents you — not the insurance company — documenting the loss, building the claim, and negotiating the settlement on your behalf.
Many homeowners handle straightforward claims on their own. But water losses are rarely straightforward, because so much of the damage hides behind drywall, under flooring, and inside insulation. If the conversation with your carrier starts to feel adversarial or confusing, that is usually the moment to get licensed help involved.
Warning Signs It’s Time to Call a Public Adjuster
- Disputed scope: The insurer’s estimate covers surface repairs but ignores saturated subfloors, wet insulation, or cabinets that wick moisture.
- Denied hidden damage: The adjuster says areas “look fine” without moisture readings or invasive inspection to back that up.
- Finger-pointing: The mitigation contractor says the insurer approved the work; the insurer says it never did — and you’re stuck with the bill.
- Delays and silence: Weeks pass without a decision, an estimate, or a returned phone call.
- Pressure to close fast: You’re urged to accept a settlement before drying is even complete or before hidden areas are opened up.
What a Public Adjuster Does in the First 72 Hours
Engaged early, a licensed, bonded public adjuster works the same critical window this guide covers. In the first 72 hours they typically:
- Photograph and inventory damage before materials are removed or discarded.
- Take independent moisture readings and verify the mitigation company’s drying logs.
- Review your policy for coverage, exclusions, and deadlines that affect the claim.
- Coordinate with the mitigation crew so emergency work is documented in a way the carrier can’t easily dispute.
- Handle communications with the insurance company so nothing you say is used to narrow the claim.
What a Public Adjuster Cannot Promise
Be wary of anyone who guarantees a specific payout or a specific outcome. No ethical public adjuster can promise what an insurer will pay — only that your loss will be thoroughly documented, your policy correctly applied, and your claim professionally negotiated. Public adjusters are licensed and regulated at the state level, so verify credentials before signing anything. North Carolina homeowners can confirm a license through the North Carolina Department of Insurance, and Virginia homeowners can check with the Virginia Bureau of Insurance.
If your loss involves flooding, keep in mind that flood claims under the National Flood Insurance Program follow their own rules and deadlines — your water damage documentation matters just as much there, but the process differs from a standard homeowners claim. A good public adjuster will tell you upfront which path your claim falls under and what they can realistically do to help.
Water Damage Documentation: What to Capture in the First 72 Hours
| Timeframe | Documentation Priority | Why It Matters Later |
|---|---|---|
| Hours 0–12 | Wide shots and close-ups of standing water, water lines on walls, and the source of the loss | Establishes the cause and initial extent before conditions change |
| Hours 12–24 | Room-by-room video walkthrough plus an inventory of damaged contents | Supports your personal property claim and proves items existed |
| Hours 24–48 | Copies of moisture readings, thermal images, and the mitigation scope of work | Creates an objective record of how far water migrated |
| Hours 48–72 | Daily drying logs, equipment counts, and photos before any demolition or haul-away | Verifies mitigation charges and preserves evidence of removed materials |
Illustrative Example: A Composite Scenario from a Virginia Homeowner
Illustrative example
In this hypothetical composite scenario, a homeowner in coastal Virginia discovers a burst supply line has flooded her kitchen and adjoining hallway overnight. Before the mitigation crew arrives, she records a full video walkthrough, photographs the water line on the drywall, and lists the damaged cabinets and flooring in a simple inventory. When the contractor presents a contract containing an assignment of benefits clause, she asks questions and negotiates a direction-to-pay arrangement instead, keeping control of her claim. Weeks later, when the insurer questions how far the water spread, her photos and the contractor’s daily drying logs resolve the dispute in her favor without a prolonged fight.
Frequently asked questions
What should I photograph for water damage documentation before the mitigation crew starts removing materials?
Photograph everything before anything is moved or torn out: the source of the water (burst pipe, roof leak, appliance failure), standing water and waterlines on walls, affected flooring, baseboards, furniture, and personal belongings. Take wide shots of each room plus close-ups of damaged items, and capture serial numbers or model plates on damaged appliances and electronics. Once drywall, flooring, or contents are hauled away, that evidence is gone, so document first and let the crew work second whenever it’s safe to do so.
Why do moisture readings and drying logs matter for my insurance claim?
Moisture readings and daily drying logs create an objective record of how wet materials were and how long they stayed wet. This helps prove the extent of the damage, supports the scope of repairs the insurer should pay for, and can protect you later if mold or hidden damage becomes an issue. Ask your mitigation company to share copies of their moisture maps and drying logs, and keep them with your claim file rather than relying on the contractor or insurer to retain them.
What is an assignment of benefits clause, and should I sign one?
An assignment of benefits (AOB) transfers some or all of your rights under your insurance policy to the contractor, which can let them bill and negotiate with your insurer directly, and in some cases pursue legal action in your name. Direction-to-pay language is narrower, instructing the insurer to pay the contractor directly. Read both carefully before signing, ask exactly what rights you’re giving up, and don’t sign anything you don’t understand just because you’re in a hurry. If the clause seems broad, ask the contractor to modify it or consult your insurance agent or an attorney first.
Should I wait for the insurance adjuster before starting water mitigation?
No. Most policies require you to take reasonable steps to prevent further damage, so you generally shouldn’t wait days for an adjuster while water spreads and mold risk grows. Instead, notify your insurer promptly, document everything thoroughly with photos and video before work begins, keep all receipts, and save samples of removed materials like flooring or carpet if possible. Acting quickly while documenting carefully protects both your home and your claim.
Related local pages
- Public Adjuster Burlington NC: Fire, Water & Storm Damage Claims Handled On The Policyholder’s Side
- Public Adjuster Elon NC — Fire & Water Claim Help For Alamance County Homeowners
- Public Adjuster Haw River NC — Fire, Flood & Storm Claim Help For Older Mill-Town Homes Along The Haw
Overwhelmed after a water loss? Our licensed and bonded public adjusters serve homeowners across North Carolina and Virginia. Contact us for a free claim review before you sign anything. Get in touch.
Last updated: July 23, 2026